
It’s spring time. Bike repair time!
What are the plans?
You gotta be able to move
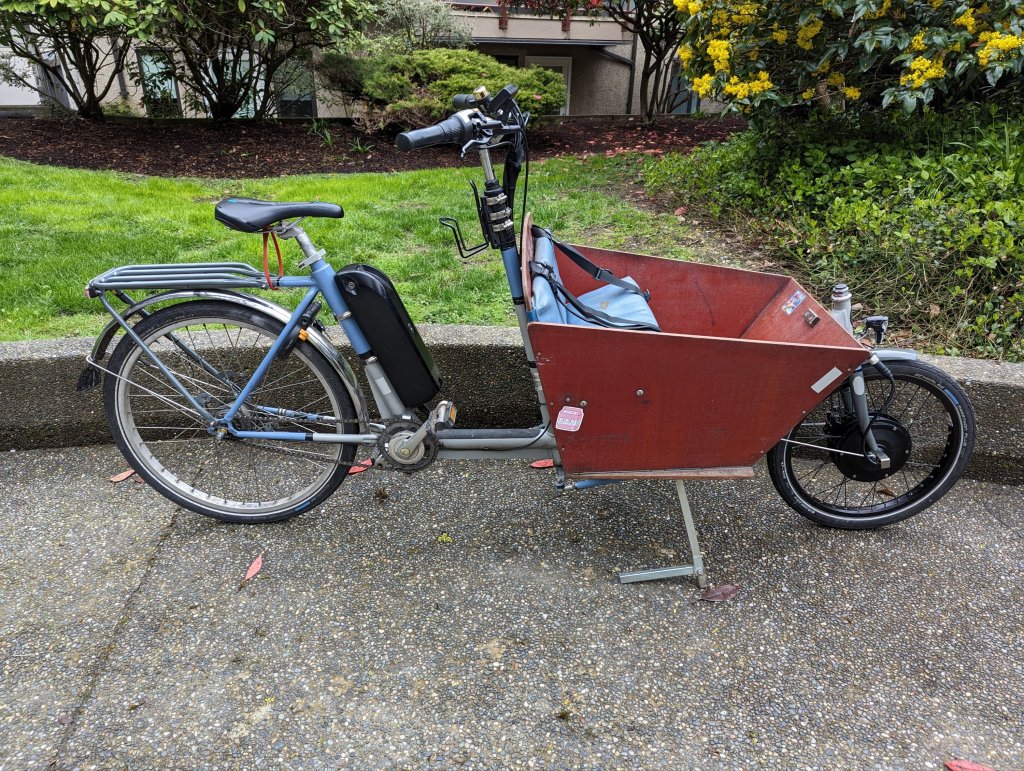
Earlier I wrote about my issues with the Bakfiets front motor hub and my plan to repair and upgrade the bike. In April I got the parts and set aside time to do this work.
You gotta be able to stop
I also had issues in the past with my front brakes fading, and although I resolved that issue, I still had problems with the rear brake being weak. I didn’t get a chance to post about the front brake repair – I’ll do that soon – but I have been riding without the rear brake cable connected for a while as I had only gotten half way through repairing it (and it’s not like the brake was working anyways).
So I took the chance when the bike was being repaired to fix the rear brakes as well.
Another poorly documented repair – back in 2022 I had significant vibrations when braking. Turns out I needed a new headset so I repaired that last year. I’ll take this chance to document that – keep in mind it’s been repaired for months.
You gotta be seen
Natasha also installed battery powered LED string holiday lights on the bike in the winter of 2021. They were festive, added some visibility when dark (which, in the winter occurs during both commutes) and Toothless really enjoyed them. However those were snagged easily and ended up breaking. I took the opportunity to replace these with a better system (or at least get everything set up for a new system).
Now that we have a new wheel and I had the front wheel off, I was able to add more reflective tape to the wheels, forks and frame.
What I did
Replacing and upgrading the electric assist system
I bought the system from Grin, which is incredibly local. It’s a very short bike ride from our new home and only a few blocks from our old home.
I picked it up on my 10 speed Gitane – I used our DIY panniers to carry the wheel.
We moved the Bakfiets to our ground floor patio. The patio is below grade and we don’t have a ramp (and one of our sets of stairs recently broke) so bringing the bike down was a bit of effort but gave me freedom to work, access to power and light and was easier to work on it in small pieces on weeknights.
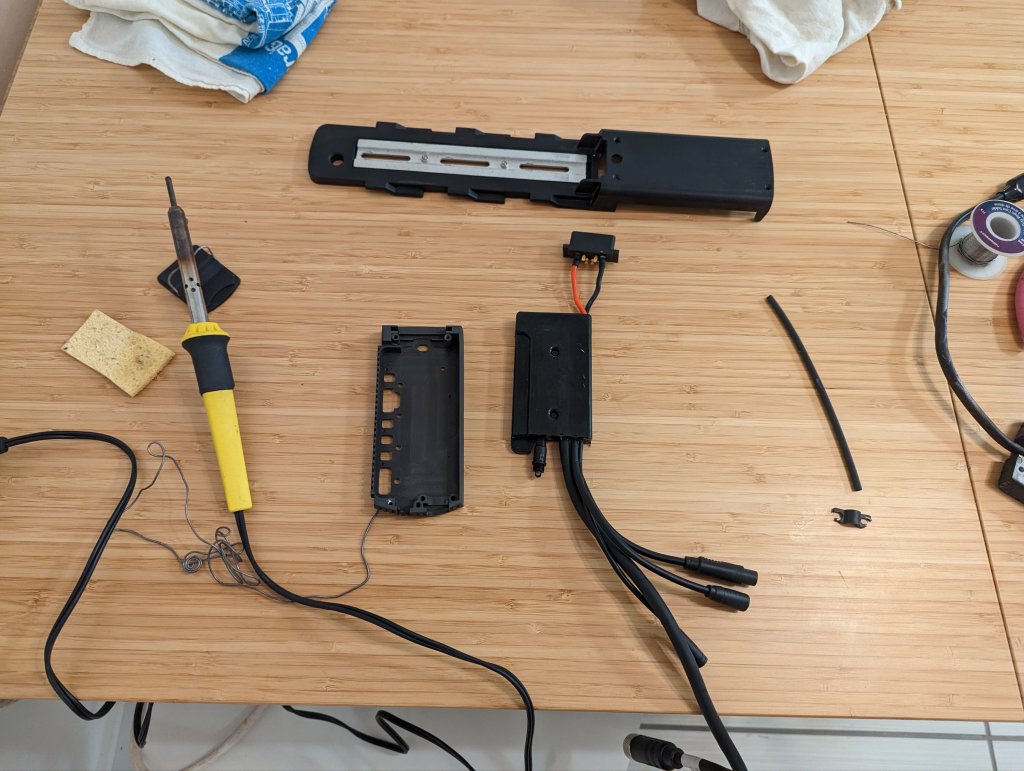
On the first day I removed the old wheel, controller and holiday lights. It was satisfying to tear it all out. I carefully removed the old controller, wheel and motor in case we could fix it later for use on our Bike Friday Hauladay, but I ripped out the old holiday lights.
On the second day I had a dentist appointment so on my way back I bought some spray paint and heat shrink, then during the evening I mounted the old tire and brake rotors to the new wheel and hub.
Mounting the tire went quickly. As I learned when I bought the bike and replaced my tires and tube on the old wheel, the only challenge with the motor hub is working around the axle and cable, but I had a left over pallet from a tile delivery from our renovation that I used. The axle fit through the slots between the boards on the pallet and it let me set the wheel down without the axle and wire getting in the way.


I then soldered the controller to the battery cradle and mounted it together (but was missing a few screws needed). It’s a tight fit for the wires but I got them routed nice and tidy.


On the third day I tried to scrounge up a few screws of the right size to mount the controller to the heat sink and cradle. I got some from work but they were still too long, and I had a headache so I just took a break. I bought the right size screws online for delivery the next day.
On the fourth day the weather was fair and I worked from home so I was able to clean and paint the front forks over my lunch hour. The original paint had been ground off by the previous owners to weld on the disc brake bracket, and while this was painted in clear coat some rust was forming. This will be one of the few opportunities I will have to clean this up, so I took it.

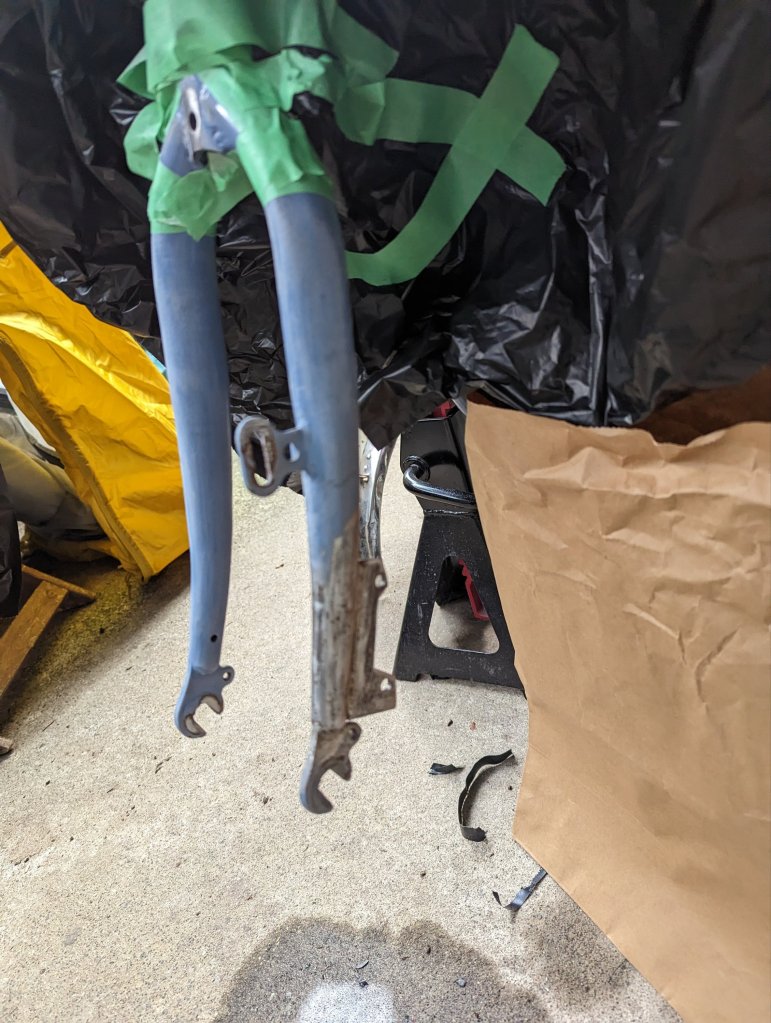


I also painted the front fender. It’s chrome and gives me a tonne of glare when riding so I figured I’d try painting it to cut down on that. No big deal if the paint doesn’t last – it’s beat up and bent and was in pretty rough shape already. I’ll add reflective tape in key spots later.

After painting, I had to wait a while for it to dry so I finished mounting the controller to the heat sink and cradle with my new screws. Everything came together nicely and is mounted tight.
Then I was able to mount the controller, Cycle Analyst and route the wires with temporary zip ties until I could get everything finalized and tidied up in a more permanent way. It looks so much better with the controller mounted in the battery cradle!
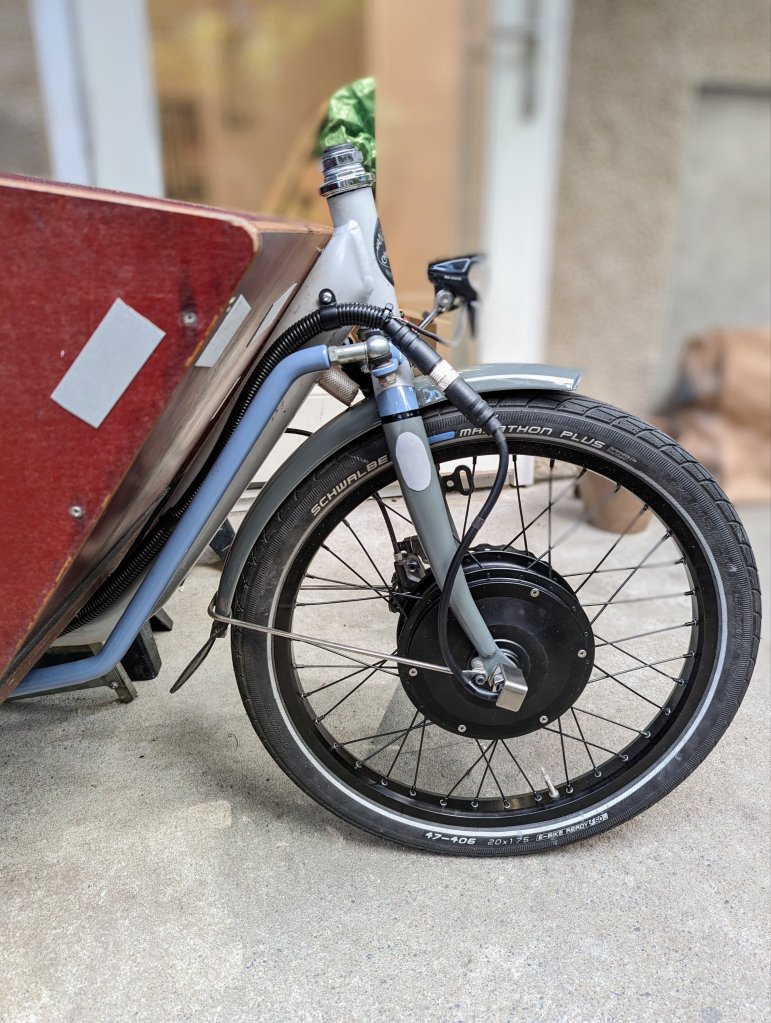
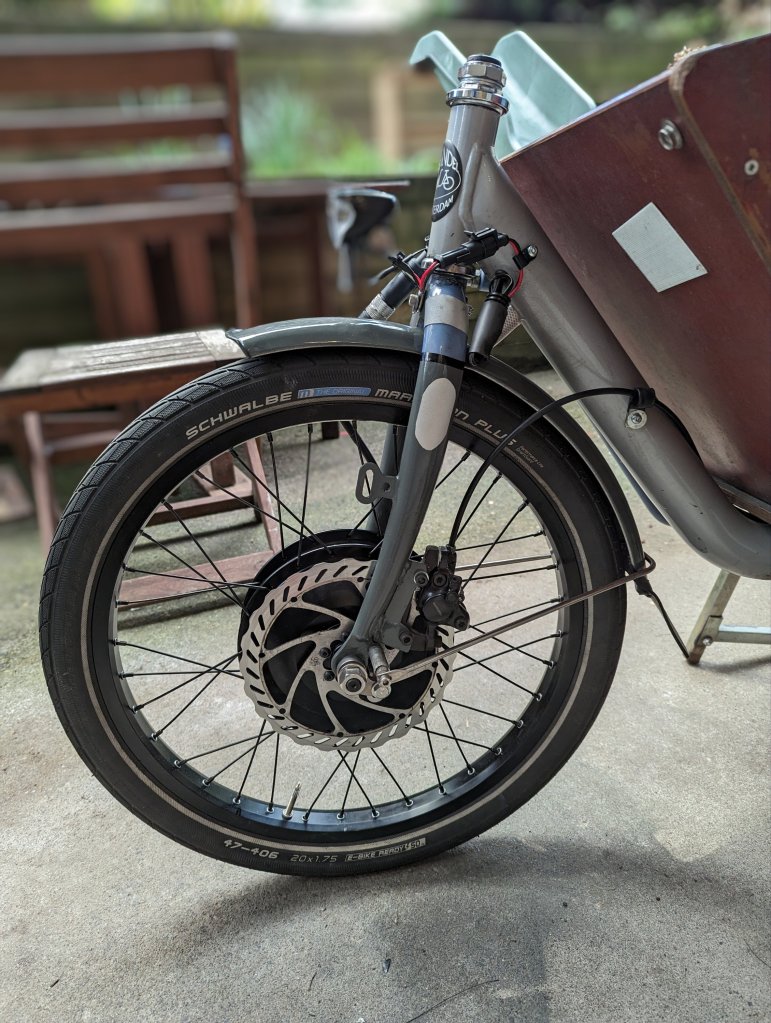
One of the last things I did was mount the wheel and torque bracket. I started by hand tightening it to make sure everything fits. A key concern is clearance for the front brakes. Then once I confirmed fit I torqued everything down and then mounted the brakes. When doing this I realized the cable extension to the motor that came with the Grin Ready to Roll kit was too short so I bought the longer (1m) version online from Grin. It was ready for pickup the following business day. This had just the right length for me to route the wires.
The brake mounting bracket face isn’t perfectly perpendicular to the wheel axis so the right thing to do would be to get a brake mount facing tool and to face the mounting location, but those are expensive and not available via my local Tool Library. So I have been shimming it. I previously used a piece of sheet metal (scraps of duct from my kitchen vent fan install) but this time I found a thin flat washer that I was able to cut in thirds with aviation snips which worked perfectly to shim the brake. Once I dialed in the brakes and got them to stop rubbing I torqued them down and was able to test out the motor.
The motor runs well, no shakes, and everything works as expected. I need to fine tune the throttle control in the Cycle Analyst but that can be done during my test drives.
I did a final wire routing and used automotive wire loom that I had on hand already to contain and keep the wires tidy. I replaced some of the old brake cable clips with plastic loops and drilled a few holes in the frame to attach more. This is much tidier than zip tying everything in place. It let me add some decent strain relief to the wires. I was able to run the brake cables separately from the wire loom so I can replace the brakes without tearing the wires out.
I used the front fender mount to hold the wire in place. While the below picture shows the connector sticking out, everything is held in place and not in the way. The connection limits the bend radius of the wire there.

I left the pedal cadence sensor off and will install that later. I need to modify the crank arm to fit it, and that’ll take a bit of work I’m not ready to start.
Repairing the rear brakes
While routing the wires and mounting the controller I decided to start by replacing the rear brake cable to see if the old one was stretching or binding, possibly causing some of the issues with the rear brakes.
We had a brand new brake cable sitting around so it was “free” and I knew we needed a new cable anyways – the old one was frayed and in poor shape.
I replaced the cable and the old frayed cable was all bound in the lever, quite frankly looked in poor shape.
I had to shorten the cable to fit; I got that done over my lunch hour after adjusting and shimming my front brakes.
Once I had the new brake cable installed it was obviously smoother and I could feel the rear brake engaging. I haven’t gone on a test ride yet but I’m optimistic. I’ll probably need to do some adjustment.
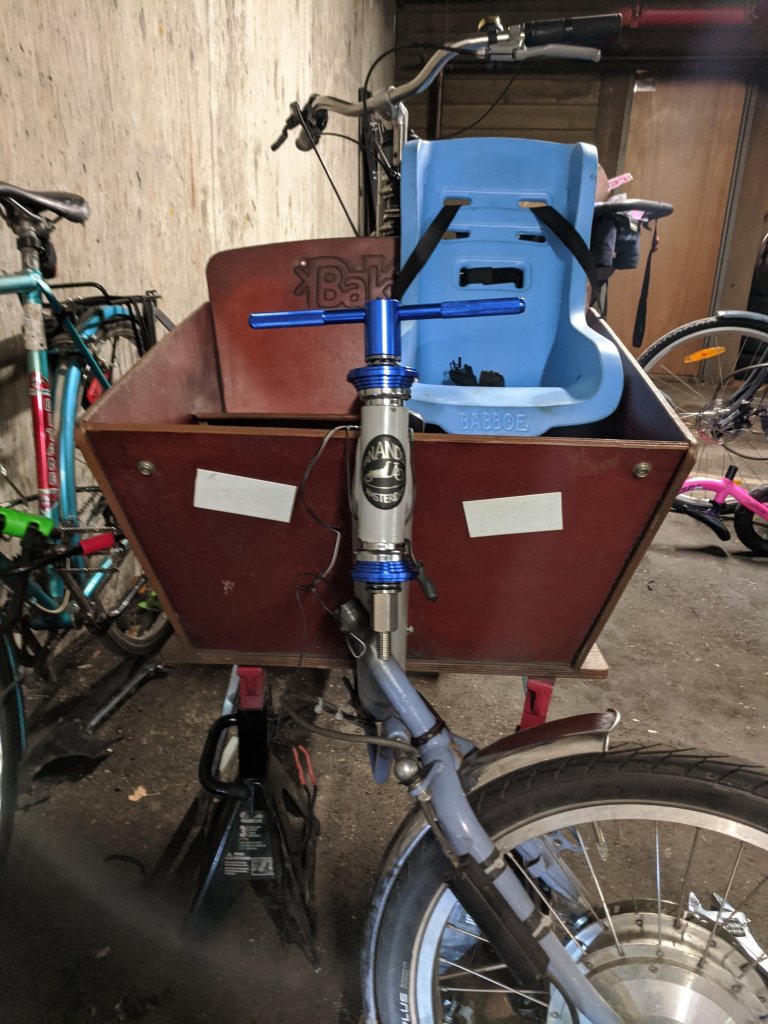
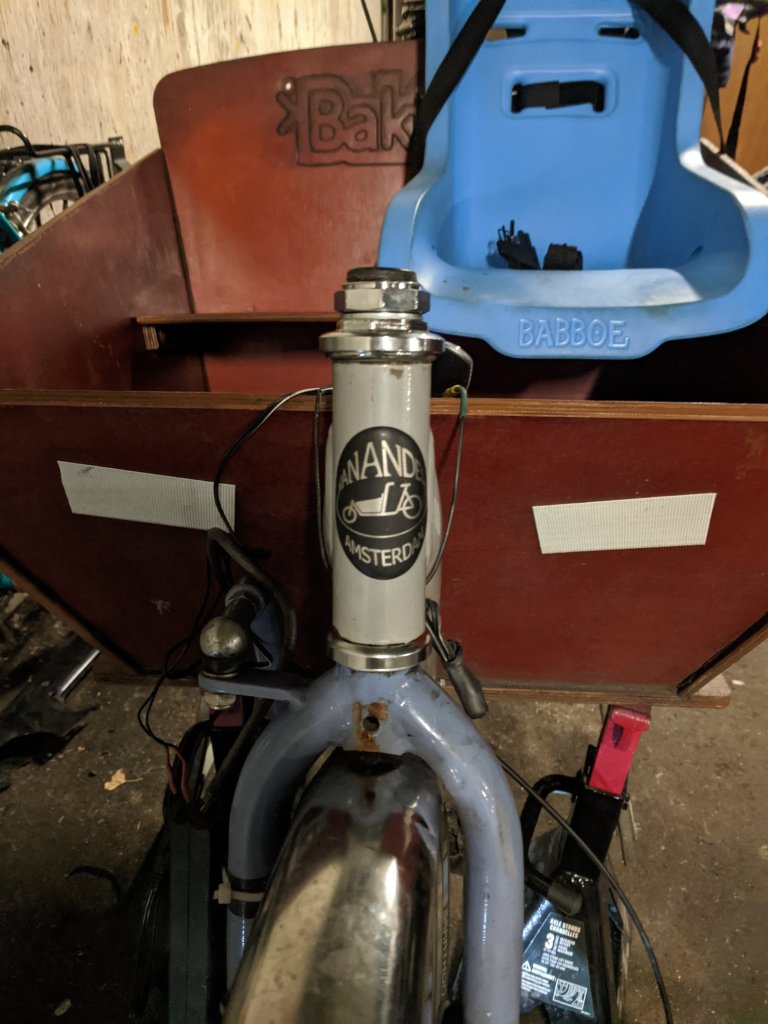
Replacing the headset
This is an old one. Last year my wheel was vibrating like crazy when hitting the brakes. Of course I took a look and realized I needed a new headset. The threads on the nut, and some of the threads on the fork, were unfortunately torn out.
I’m not surprised. There is so much load on this headset. It’s probably original too.
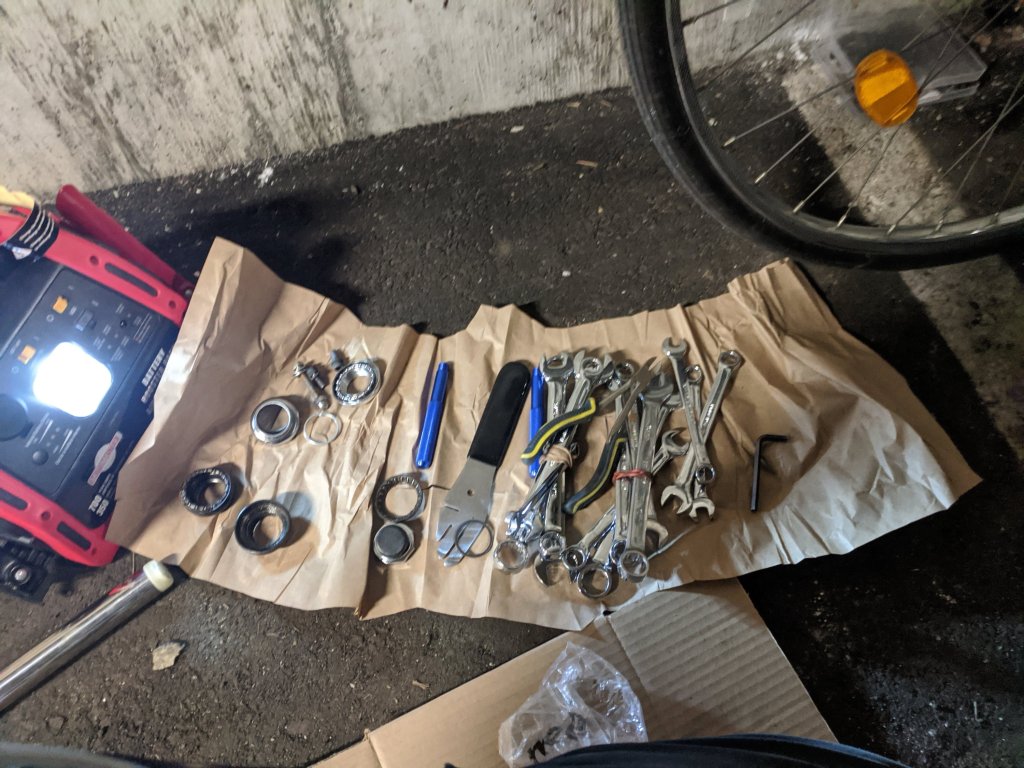
I haven’t replaced a headset before so this was a first for me. I had to buy some tools, but it was a breeze. I had to use two spacers to get it tight but otherwise no issues since installed.

Repairing the headlights
The wire connecting the headlight to the tailight broke so it would only work if positioned juuust right. I blame toddlers yanking on the wires. I had something similar with the power wire for the headlight too.
Previously I just had it taped into position just right and sometimes when turning the wheel too far the light would temporarily go out. Not ideal.
The Cycle Analyst puts out full battery voltage. I have a 36V battery. While my headlight works at 6-42 V, the taillight is a 5-15V one so I still need the DC-DC converter to step it down until I get a new taillight (which may never happen). There are some Busch-Mueller ones (same brand I have now) that I have my eyes on but can’t find in Canada and they are expensive.
I already have a 6V DC-DC converter but that voltage limits what other lights I can connect. I decided to buy a 12V one instead to give me lots of options for waterproof (automotive) LEDs and LED strips. I soldered barrel connectors with 3ft leads on it, and mounted it on the bottom of the box.


For the headlight wires, I had to lengthen the power wires to the barrel connector anyways since the plug is now up at the Cycle Analyst. If I choose to eventually run the headlight without a DC DC converter (again, which would require a new taillight), I’ll need to be able to wire it directly, so the extra wire length was nice to add in now before I routed all the wires permanently.
So I both extended the wires by a lot and repaired the broken wires. I replaced the old spade connectors that connect the taillight with a sealed automotive plug I had from working on my Jeep. This let me cut out the broken wire and the connector added back in some length so I have enough slack when turning the wheel, and still lets me disconnect the light from the bike. This also gives me the option to tee in other lights between the headlight and taillight without adding another plug. I have some orange marker lights in mind that might fit nicely on the old dynamo mount.
All of the connections are soldered and use heat shrink.

Reflective tape
We had some 3M reflective tape left over. I think we bought the roll at Dressew years ago. This stuff has gone on every bike we have owned. It’s almost all out, so I have to be strategic with how I use it.
I added some on the forks around the headlight to give some more surface area around the headlight reflector. Toothless also helped me put a couple pieces on the forks.

I put a couple strips on the front of the box. I already had some short strips on the sides of the box.
LED strips
I looked around for some 12V waterproof LED strips. There are a few options. 16 feet draws roughly 1A, so I probably want to target 5 or 6 feet total to prevent too much current draw (the Cycle Analyst DC power is internally fused at 1A)
I think I’ll run a short strip on the front of the box, along the side of the box and a short strip on the back.
I have an option selected, and am ready to wire it in with the DC-DC converter, but am waiting a bit before buying and installing these to make sure everything else works before I add new stuff to the system.
Making it look nice
I also wanted to get Toothless involved so I got him to put a sticker on the side of the box (location was his choice). He had a sticker a friend gave him so he chose that. So now I have a pink cartoon milk carton on the bike!
I also spent a bit of time painting the rear rack. It was rusted in spots when we bought the bike and I had quickly painted it in black spray paint, but it looked rough. I cleaned it up and used the same paint as the forks. It looks good now.
Does it work?
I went on a test ride before I hooked up the DC-DC converter for the headlights. I had to get the bike off the patio and expected some parts to come in the mail the next day after Toothless has swimming lessons. So I figured I’d give it a test drive, and if everything worked out I would ride it the next day to take Toothless to swimming lessons and use battery powered lights for the time being, then connect the headlights a day or two later.
I have to say, as soon as I hit the throttle I almost giggled.
The old motor used to rattle and made lots of noise and was kind of slow to accelerate. The old controller was kind of a black box to me and seemed to max out on power when going up hills. It was never really a problem but there were times I really needed to pedal to even make it anywhere. I even considered getting a new gear hub with more gears to compensate.
The new configuration accelerated smoothly and quickly and was whisper quiet. I could barely tell the motor was installed.
The work I did also quieted down a number of other squeaks and the entire bike (mostly the new front wheel) felt tight and smooth. It was like a whole new bike.
After going around the block a few times I hit a bump and my front brake misadjusted. I went home and readjusted the brakes and realized it loosened up. Something must have gotten bound up a bit when I originally tightened it, making the bolts feel tight but not actually be fully seated. I readjusted the brakes and tightened the bolts and rode it longer without any issues. My rear brakes also finally work for the first time in a year and a half.
Toothless woke up from his nap and I took him on a short ride. He giggled and said it was fun. This was his first ride without his booster seat.
Before dinner a package arrived – my DC-DC converter came a day early!
After Toothless went to bed I hooked up the DC-DC converter and tested the headlights. I whooped in glee when they turned on .. just as a neighbour walked by. Oops.
What’s next
Housekeeping: I should probably compile all the parts and cost for this work and post it.
Fun Stuff: Next up, I need a longer test ride!

One thought on “Bakfiets maintenance and upgrades 2023”