
I feel like I’ve been through lots of packs, but on reflection I think I’ve gotten a lot of use out of them.
Previous Packs
I started with a MEC pack; I believe it was a 60 L Cragalot back in 2008. I was a student. The pack was on sale (cheap), available at MEC, fit well enough and was quite water resistant (a benefit on the west coast). I didn’t really know what I wanted at the time and I was just scraping together gear. I bought a lot of gear at the dollar store in those days (nothing to be ashamed of).
The Cragalot, at least the version available at that time, was very heavy and did not have a lot of external pouches or pockets. At the time a lot of external pockets and features were the rage with packs, but I just wanted something I could strap stuff to or strap my own pockets to. So I didn’t like how heavy it was, but I liked how it didn’t have any frills.

Hiking Cape Scott with the Cragalot
I kept the Cragalot a lot longer than I should have. By the time I wanted a new pack, I got Natasha into hiking and we had to spend our money getting her new gear. She got a Gregory pack that she really liked at the time and I couldn’t admit to her that it cost 2-3x what I wanted to spend. So I didn’t upgrade my pack for a couple years. Admittedly the Gregory was a good investment because it fit her well enough and she got bitten by the bug.. and now that’s what we do together for fun!
After hiking the Bridge of the Gods to Timberline Lodge section of the PCT together, I knew the Cragalot was dead. I had a new pack picked out on the Amtrack Train home.
I ended up getting a Boreas Lost Coast pack. It was also no frills, stretchy, and just good to stuff my gear in. The hip pockets were great (I didn’t have them in my Cragalot) and the Boreas bag was quite a bit lighter.


I’m a small guy, so I do have a bit of a hard time finding gear that fits me (see post about the MEC Scout Pants!). I found after using the Boreas bag on a handful of trips, including the JMT, SCT and JdF that as my waist goes down in size the pack gets uncomfortable. Also, the pack is stretchy and doesn’t compress. I’ve been reducing my gear weight and size quite a bit.. and the pack just couldn’t get small enough.
After the Juan de Fuca trail I basically had it with my pack (at least for longer trips). I went looking for something that fits better, can compress (preferably a roll top) and had the ability to strap things/ addons to it instead of having restrictive pre-set compartments.
The Selection
I’m not going to bore you with the selection process. As I mentioned in previous posts, I built a spreadsheet and poured over options carefully. I looked at everything on the market at the time and considered:
- Waist size
- Volume
- Max weight
- Style of pack – roll top vs lid; frame vs frameless, etc
- Material options
- Mass
- Options/ compartments
- Price
Ultimately I had a few options that stuck on the top. I ended up shortlisting:
- ULA
- Granite Gear
- MLD
- Katabatic Gear
- Hyperlite
- ZPacks
I looked at many others, including the VARGO external frame pack (looks cool!) but the above made the short list for various reasons.
We already had a ZPacks Duplex tent, so I had a good idea of how well it was constructed as well as how cuben fibre is.
However I didn’t let that drive me in that decision.
Natasha has a Granite Gear pack and I have seen the others on the trail at times. They are all good packs for different people.
Ultimately I still went with the ZPacks ArcHaul because:
- The waist size is appropriate for me
- The pack is quite light (roughly 680 g was listed mass)
- I prefer a framed pack vs frameless. The suspension system seemed like a good compromise.
- It’s a roll top
- ZPacks has a lot of addons you could have them add directly on the pack or you could strap on yourself.
- The pack came in dyneema (not just cuben fibre) so had some compression/ stretch and is wear resistant
- The pack could come with straps added on to add compression and keep the pack tight to me. The straps could also let me hang things off my pack.
- It came in green!
Fit
The pack fits me quite nicely. I take a 27-28 inch waist pant, and this pack has plenty of room for my waist size to grow up and down. I feel like I have a lot of room up and down on the shoulder straps and the waist belt fits me properly on the waist and not too low.
Most of the straps hold up nicely and don’t shift around, but the suspension system loses its tension over time. I find it’s best to readjust it every day. This is both a little annoying as well as kind of a good thing. This means my pack is sitting right EVERY DAY. No matter what I have in it on a given day, or what I am wearing, or how I’m feeling. I am considering using paint pen or coloured stitches on the straps to mark their “normal” spot for quick adjustment but I haven’t gotten around to doing it yet.
Features & Setup
I’ve got several addons:
- I have gotten two belt pouches
- Two top side pockets
- Roll top closure straps (these keep the pack tight and easy to manage)
- Shock cord lashing
I got the bag in green dyneema.
Being “Cool” with my ArcHaul
You can read about the standard features of the bag on the ZPacks website. I’ll talk about what I like about the standard features first, then describe how I use the addons.
Side Pockets
In general side pockets aren’t ..revolutionary.. but the side pockets on the ArcHaul are pretty deep and decently sized. On one size of my pack I fit a water bottle (Gatorade or 1 L smart water).

ArcHaul in Denali. Smart water bottle in the deep side pocket.
On the other side I actually stuff my ZPacks Duplex in. I can’t fit the Duplex in the side pocket if I have the tent stored in the stuff sack that ZPacks provides with the tent, but if I re-roll the tent skinnier and taller it fits in the pocket perfectly (and isn’t too tall for the pack). For the Denali trip I made a custom tent stuff sac out of plastic and tuck tape for added abrasion resistance. For the GDT we made one out of spare ripstop nylon from the MYOG quilt kit we bought.
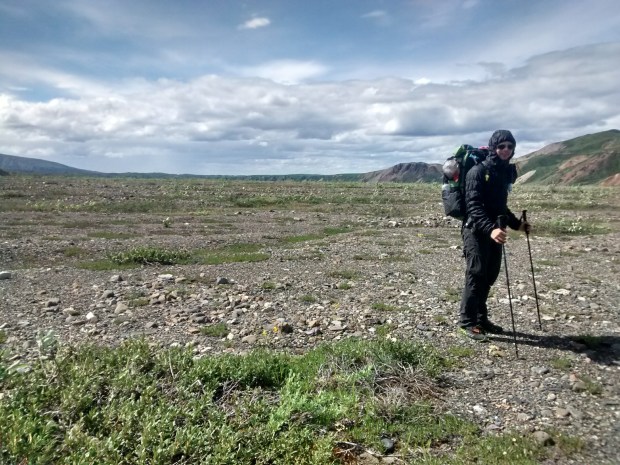
ArcHaul at Denali. You can see the Duplex in the side pocket.
Overall quite good. Not very stretchy but they are sturdy and deep enough.
Frame & Straps
The straps are narrow, but sturdy enough for their purpose. I never feel like anything on this pack is undersized for the stresses of the application.
Other reviews will give you a better description and in detailed analysis of how the straps are all set up, but I will just say that there is a lot of adjustment and once you figure that out the straps work quite well.
If you are reading this you probably know that the frame is constructed of round rod for the vertical system, and flat bar for the horizontal system. You then use straps to tension the pack and “arc” the vertical bars to give some tension and to keep the pack off your back. There is a mesh system that sits against your back. You tighten the straps until you get the pack far enough off the mesh panel to be comfortable.
As mentioned in the “fit” section, I find that I need to readjust the pack fairly often. This isn’t a bad thing. however one thing I find annoying is that I have to hold the pack firmly (sometimes pressing down a bit on the top) to tension and “arc” the frame. Sometimes when I do this one of the vertical bars will arc in the wrong direction. Or sometimes I will have the arc in the correct direction, but then when I start adjusting the strap is “flips” around. Because each vertical bar is tensioned separately the pack can also “twist” a bit so it takes some care to have both sides adjusted the same.
The waist belt is a good system. I like how the straps cross over. The buckle is very easy to do up/ undo. The buckle is small, which is nice because I can easily grip it with my my fingers. My Cragalot had a large buckle which was awkward to handle. The waist pads are wide. And the strap/ belt system allows for attachments. As I mentioned in the fit section, there is enough room for me to gain or lose waist size (both through my body weight and clothing) when using this pack. For me it’s a great fit.
Water Bladder System
The water bladder system is simple. There is a strap inside the pack to hang a bladder of your choice. And there are two exit flaps to pass your hoses through.
It works well for me and doesn’t let water into the bag. It took a bit for me to figure out how best to hang my water bladder, but using some cord/ rope and a clip from our “MYOG/ Gear Repair” box in the closet I was able to make it work.
Back Pocket
It’s large, and simple, like my Boreas Lost Coast pocket is. No complaints. Versatile. It’s stretchy so anything that is stuffed into the pocket will not be compressed. With the (optional) shock cable I can add some points of compression as well as hold the gear in position within the pocket. So the shock cable running across the pocket can kind of act like a mechanism to separate the back pocket into different compartments.
Belt Pouches
The belt pouches are optional. These are square, decently sized and they fit over the belt quite nicely.
I have two belt pouches:
- One for food and snacks to eat while hiking (and trash, lip balm, etc). At camp I take this pocket off my pack and stuff it in the bear can so I keep all food scents away from the tent.
- One for toques, sun hat, gloves, and other gear that I swap during hiking. This stays on my pack all the time and I keep it on my waist for quick access.
Clearly, if I can fit a hat, toque, gloves, sunglasses, etc into a pocket they are a pretty decent size.
The pockets attach with a plastic toggle and cable to keep the ends in place. And an elastic fits around the waist belt.
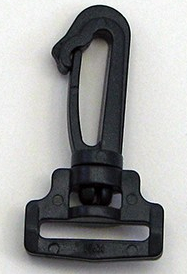
For the pocket I keep on my pack permanently the toggle attachment system is OK. However for the one I remove every day at camp I need a better system because the toggle is difficult to manipulate every day with your fingers. I am looking at getting a mini s-clip or similar to use instead. So far I’ve been using a plastic clip like the below and it’s been working OK, but could use improvement as it comes undone sometimes.
Natasha also has the same side pockets and uses them on her Granite Gear pack.
Top Pockets
These are mesh, with solid backing. The attachment system is the same as the side pockets: toggles and cable. I replaced one toggle on each with a clip so I could release the bottom of the pocket and reattach it quickly.
On the tent side of my pack I use the top pocket to help retain the top of the tent. This is where the clip comes in handy. I can unclip the pocket and use the bottom strap to strap in the top of the tent. I use this pocket it to contain the tent pegs and footprint. The outside of the pocket is mesh, so it allows the footprint to dry and it also keeps the wet footprint away from the rest of my gear.
The other top pocket is used for my trowel and sanitary supplies (used and new toilet paper). Similarly this keeps these items away from my food and water and helps keep the rest of my gear clean.
Shock Cord
The shock cord is strapped over the outside of the pack. I use this to tighten my pack up, but mostly I use it to keep the gear in the outside pocket a little compressed. I also dry my gear after wearing or washing it by looping it around the shock cord. I can fit a pair of underwear and two pairs of socks quite nicely on the shock cable to air/ sun dry while I hike. I used to use safety pins to attach my clothes to my pack while drying, but those had often come undone so I much prefer the shock cord. I’d rather not lose a pair of underwear on the trail!
Conclusion
I’ve really only been to Denali (9 days), Stein Valley, a section of the SCT and some short overnights with this pack, but I am quite pleased with it. It seems durable enough but time will tell. The style and design of the pack is very compatible with how I pack and hike, and I am very impressed with the list of optional upgrades that Z Packs offers and just how well they integrate with the pack itself.
I will be taking this pack on the GDT and I am sure I will document how well I like it on that trip!

One thought on “Gear Mini Review: ZPacks ArcHaul”